In a previous article, I discussed my experiences in developing film with Caffenol-C. But how did I get the photos from celluloid to digital?

There are two ways I went about it. The first method I tried is by using a flatbed scanner. 120 film can be digitized on a flatbed scanner with ease. While the quality is passable, the fact that my scanner will only export to JPEG means I cannot do much color correction.
35mm film on the other hand is a bit trickier. When I tried to scan 35mm all I got was a silhouette of the film. Then I remembered back when my family had a dedicated flatbed scanner, it had a light box that you attach to the film. The fact that I needed back light to get the transparent film scan properly meant I was out of luck on this front.
With my money blown there was no way I can afford a proper 35mm film scanner. My only solution then was to find a cheap alternative. Luckily my research paid off in the form of Paulo Ricca's article "How to Scan Film Negatives with a DSLR."
"Fantastic!" I thought. "I can use the stuff I have. But..."
And there's always the "but." Ricca's scanning rig was quite elaborate. He used laser-cut MDF for the film carrier, white acrylic for the flash diffuser, and a cracker box for a snoot. Fortunately Ricca did say you can replicate the results by using alternative materials. Then I asked myself "what can I use to build this rig without blowing the bank?"
Let's cover what I have access to: a DSLR, a 28mm macro lens, a flash strobe, and a flash trigger and receiver. That leaves me with building my film rig.
Parts
To keep costs as low as possible, these are the materials I used:
- small packing box (free)
- sheet of 8.5"x11" printer paper (free)
- rubber bands (free)
- masking tape (free)
- foam core board ($1 USD)
The box will act as my snoot, the paper as my diffuser and the foam core will be the film carrier.
Build
For the box I started by taping the paper on the inside. Each end of the sheet are attached to the flaps on the top and bottom. This step can be tricky, but folding the paper over the edges of the flaps help.
After sealing the box I proceeded to trace an one inch border on either side parallel to the paper inside. Using a box cutter I proceeded to cut out openings. At this step the snoot and diffuser are complete.
As an added option I cut open a hole on the top to let light through so that I may see the film as I set the next frame.
For the film carriers I cut them to the size of the side of the box, then cut out holes appropriate to 35mm and 120 film on each board. To hold the film in place I used scrap pieces of foam core held in place with, as you probably guessed, rubber bands.
Camera Settings
Now that my rig was built and ready, it was time to try it out.
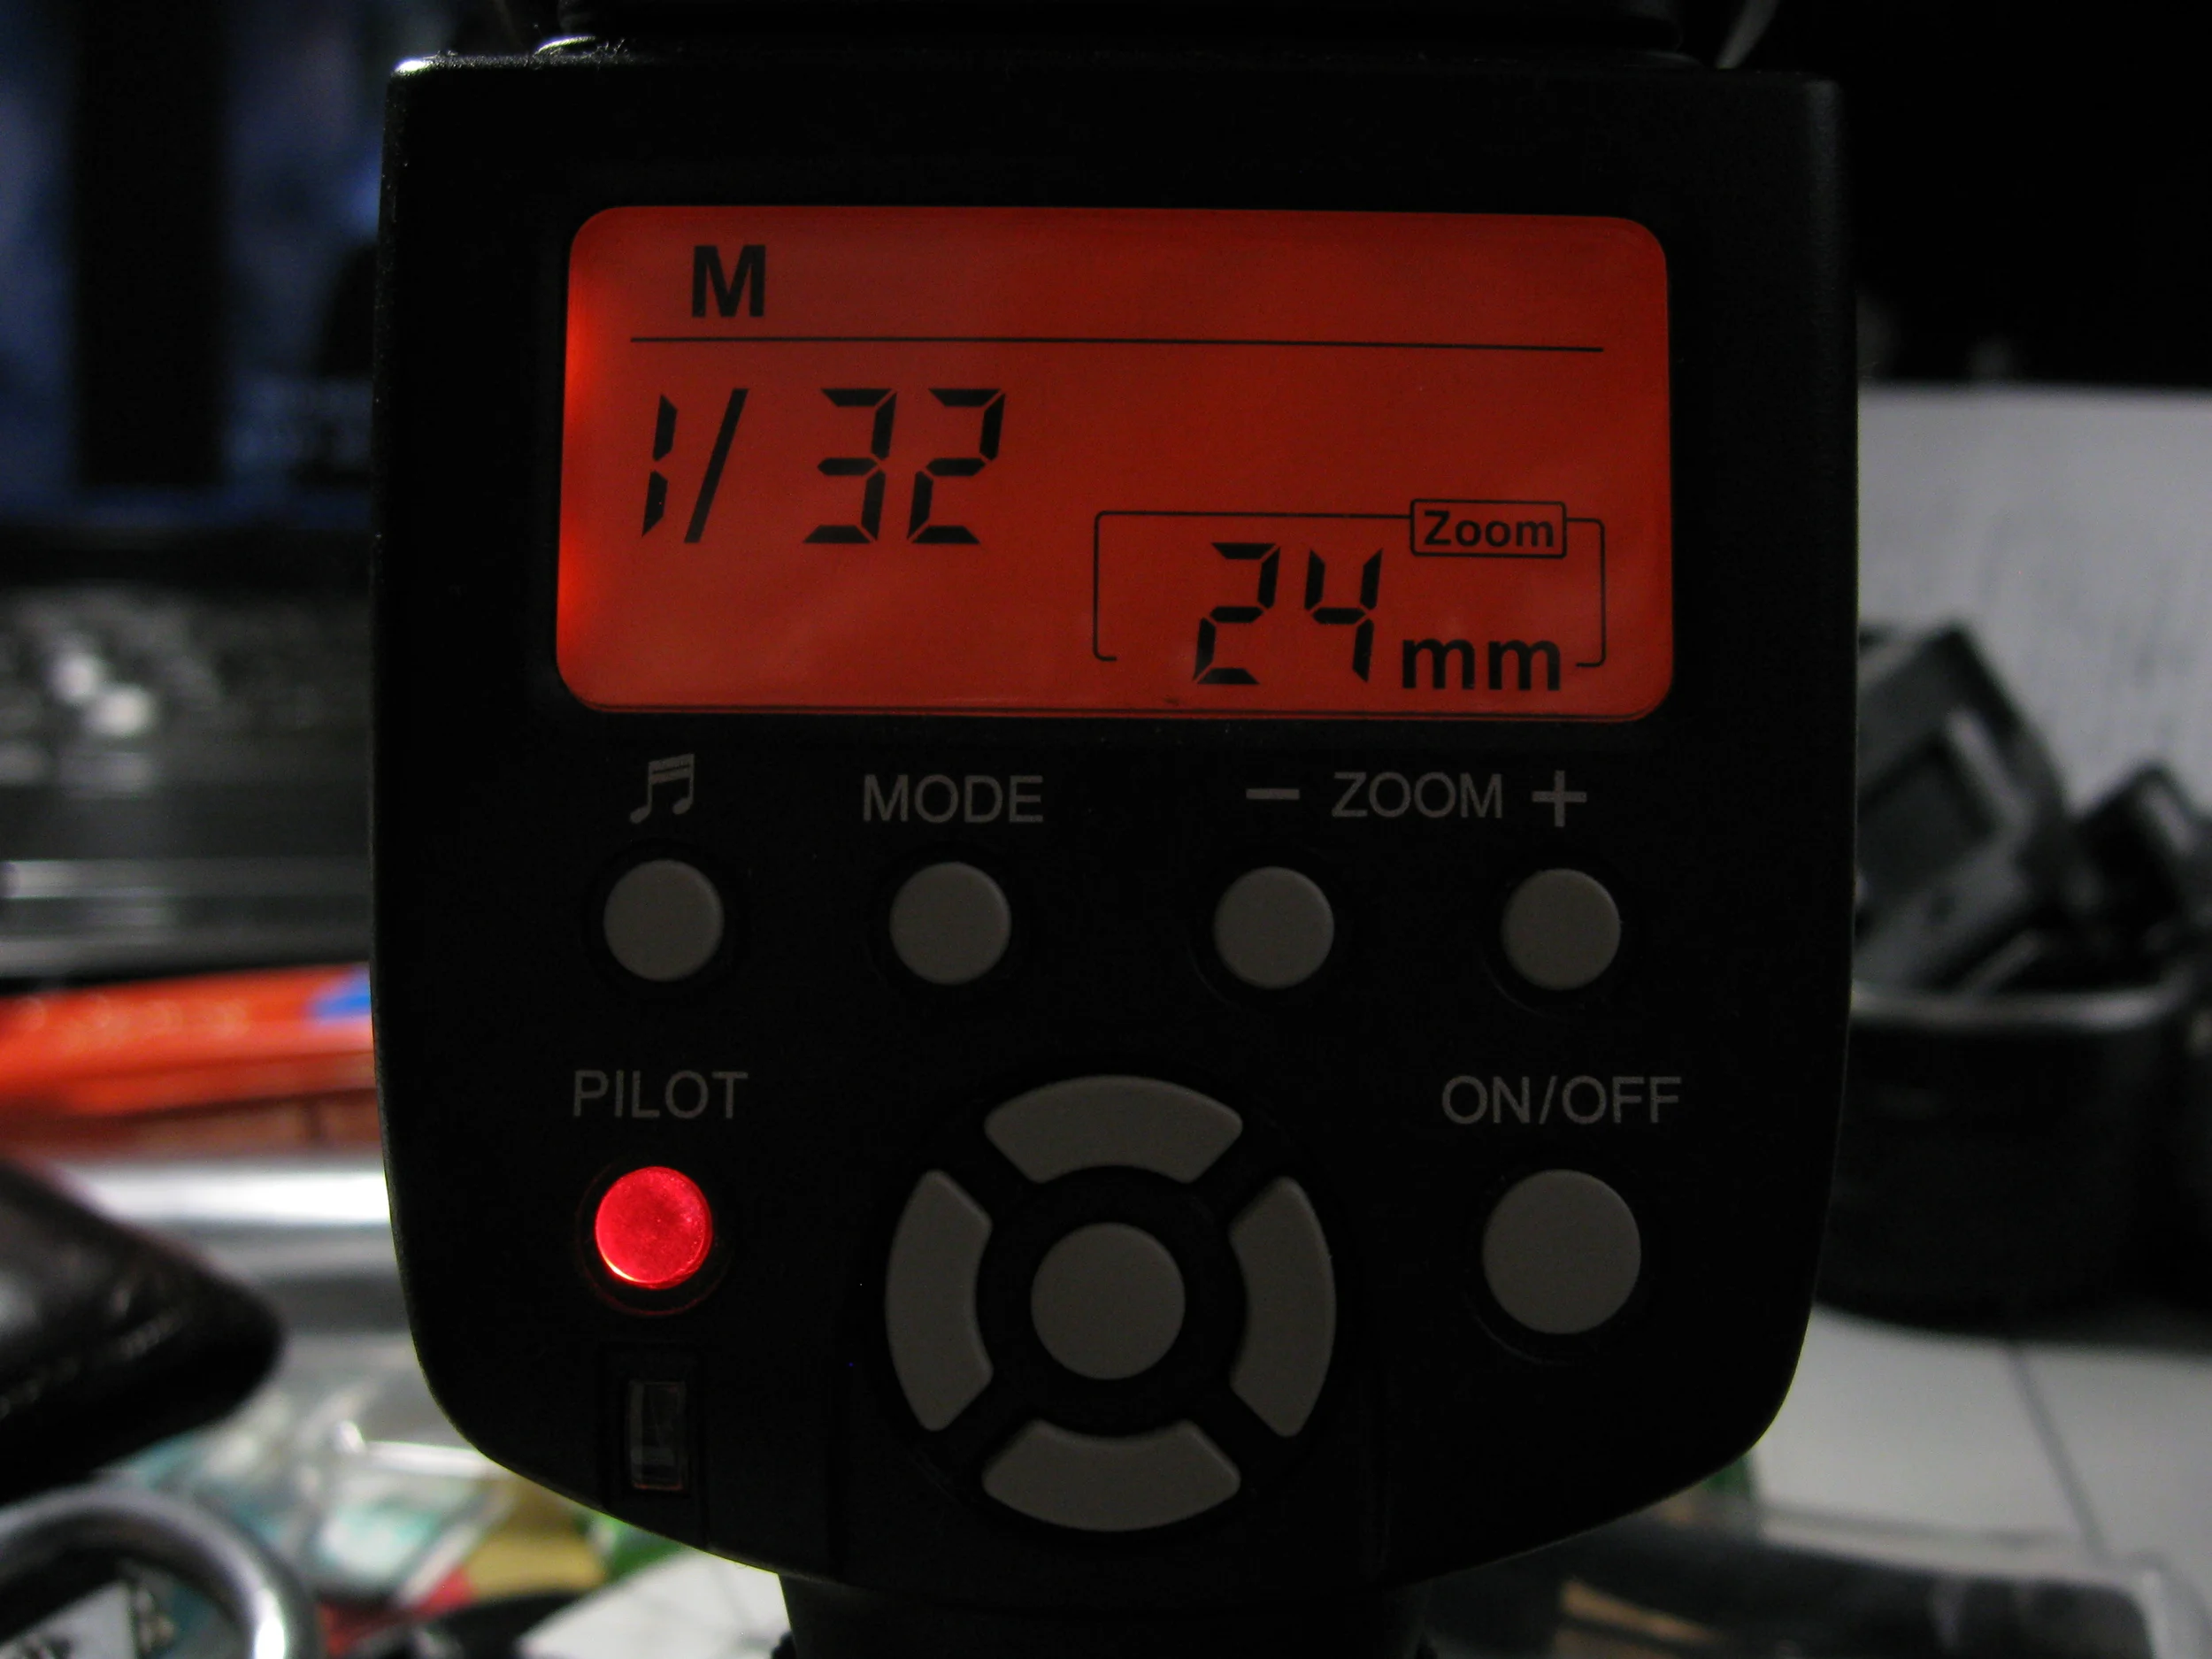
My strobe, a Yongnuo YN560-II, is set to manual mode with flash power at 1/32 second. Zoom on the flash is negligible.
On my camera, I'm shooting at manual raw, ISO-100, shutter at 1/200 (due to flash sync), and aperture on f/8 to f/16 depending on how much contrast I wanted in the photo. I am shooting raw so that I have better control of the image in post processing. More on this later.

These are the settings I used on my camera.
Another piece of equipment that Ricca recommended to have is a remote shutter release. Getting your hands away from the camera guarantees the shot will be stable. Luckily I have a shutter release that you can find online for less than $10.
Shooting
Now comes the long and repetitive process.
1) Turn on your flash and make sure it fires
2) Place the film on the carrier
3) Set your focus
4) Take the shot
5) Advance the film to the next frame
6) Repeat from step 3 until finished with all strips of film
While it's straight forward, you will have to move or remove the film and set the camera again for proper framing and focus. You can finish scanning a whole roll of film in half an hour at best. But if you plan on doing this for several rolls of film, prepare to dedicate an entire weekend or more.
Post Processing
This is the part where things get interesting. It's the step where you import your photos from your DSLR into your computer to see what kinds of results you get.
With my SD card out of my camera, I put it in my computer. But how did I see the photos? My image viewer of choice is called IrfanView. It opens just about any format I throw at it and it's capable of opening some video files too.
When I see the photo that I want to edit, I import it into Photoshop and start tweaking. Usually Photoshop doesn't open a raw image from a DSLR. Luckily Adobe pays attention to their users and released a plug-in called Camera Raw, which is available on their website.
To start, I usually crop the image. Cropping lets me keep what I want and discard what I don't want. If the film image is taken in a portrait, then I would rotate the image to get it upright.
Since the image is a photo of a negative, you will need to invert the colors to get a positive image. Unfortunately Adobe Camera Raw doesn't have that option. From what I learned from scouring online forums, you can invert the image in Camera Raw by doing the following:
1) Click "Tone Curves" (2nd icon under the histogram)
2) Click "Points" tab
3) Set "Curves" to custom
4) Place the left point on the graph on the very top
5) Place the right point on the graph on the very bottom.
This essentially inverts the image for you. While you can do this in Photoshop after you finish changing your exposure settings, seeing the results as you change the settings can be useful.
At this point you can play with the other settings to get the exposure you want. I usually play around with the Exposure, Contrast, Highlights, Shadows and Clarity when I'm working on a black and white photo. If it's a color photo I'd play with all of the settings. The histogram (the graph on the top right) is very useful as it will tell you if your image is overblown or underexposed. Most photographers will say that you want to expose to the right or in the middle, but ultimately where the values fall on the histogram is up to you.
Results

This is how the picture looks as photographed.
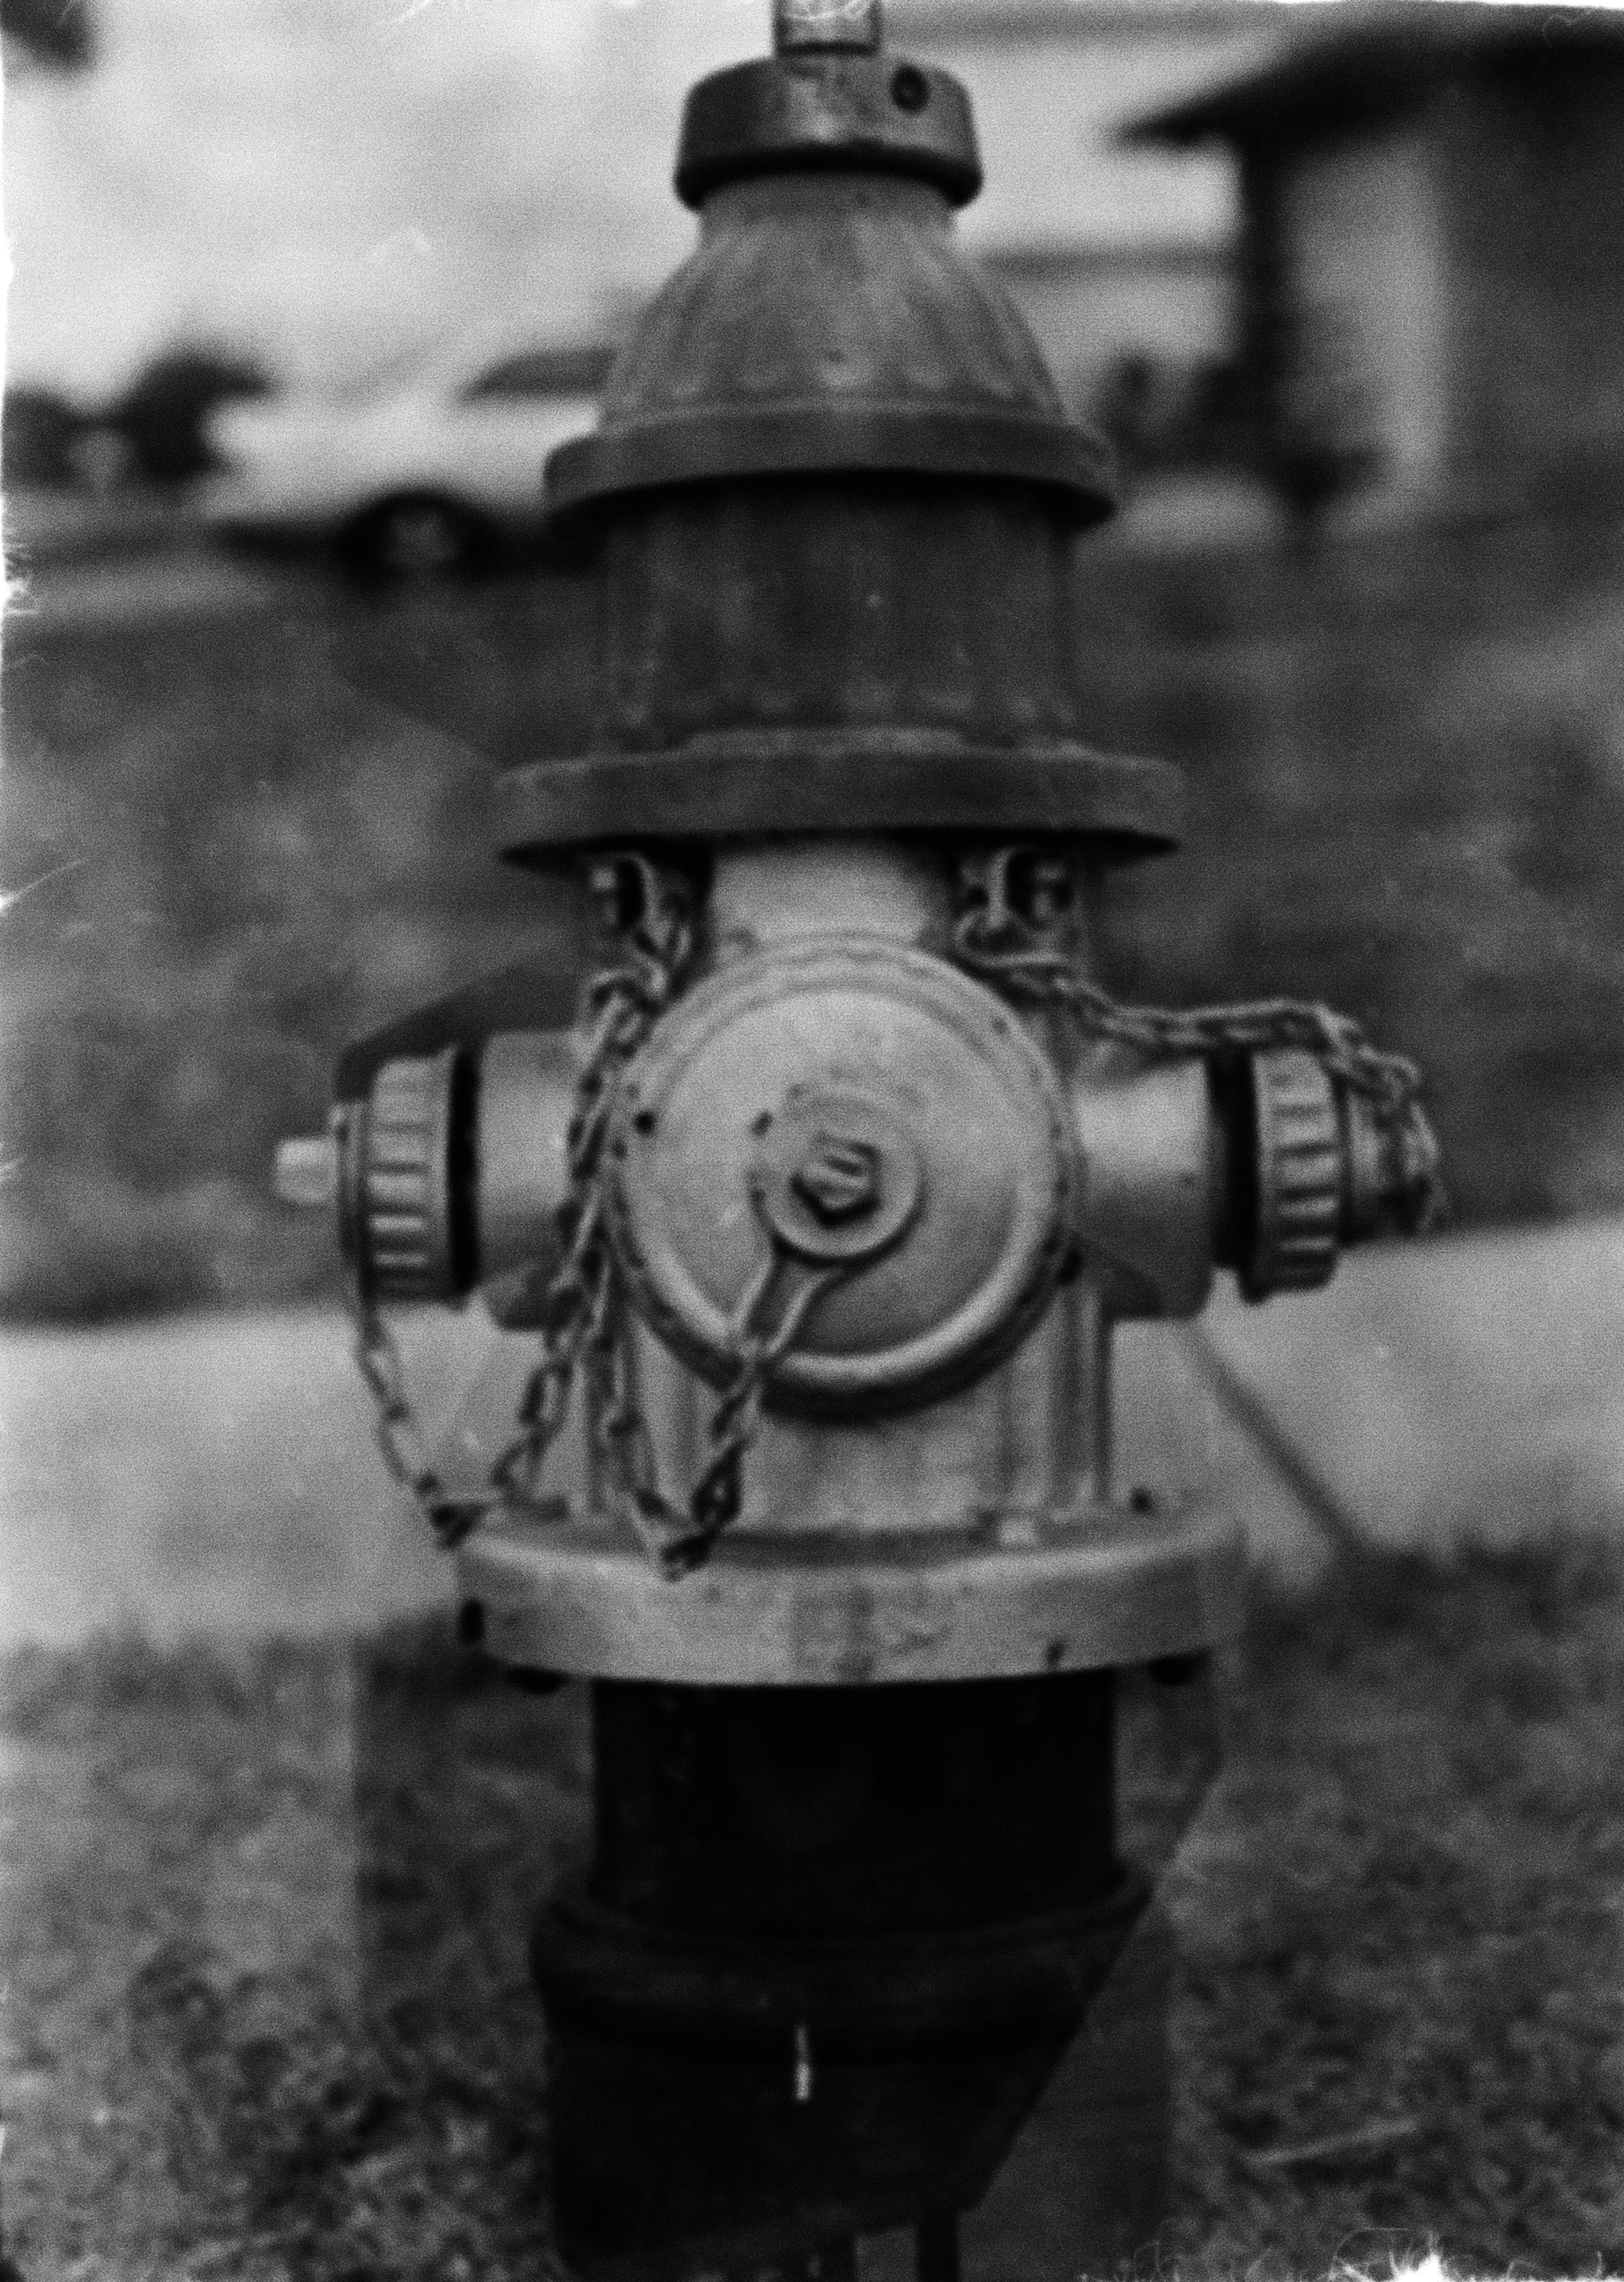
This is how it turned out after post processing.
I can definitely say that I am happy with the way the photos came out. But there are things that can be better.
First, the sheet of paper doesn't perform well as a diffuser. Rather than having even light throughout some images, there are "cold spots" where the image is darker than others. There are sheets of translucent sheet acrylic available for less than $10, but I can find them online only.
Second, the film carrier is a very clumsy solution. Each time I remove it I would have to refocus my camera. If I can remove the carrier without having to refocus every time I change frames, then I would be golden.
As a budget solution, it works very well. I was able to digitize film images with ease without having to spend too much and I was able to build it with stuff I already have. There are improvements to be made on the rig, but the results I can get from it definitely outweigh its disadvantages.